green V neck.EZ V Neck Sweater: How to knit the Sweater.

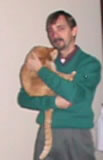
(AKA: Jim's Sweater)
This is an simple to knit V neck sweater.  I knit one for my husband Jim.  Ok. right now, I'm showing an over exposed picture of the sweater on the floor.  It fits Jim nicely, but Jim doesn't want to model.   If I ever get Jim to model,  I'll post his picture.

The design for the sleeve cap is similar to many commercial sleeve caps. It also limits some sleeve width and armhole depth combinations.   If you like tight sleeves with deep armholes or  loose sleeves with shallow armholes, you must visit the full generators.  You can find them by first visiting the home page  and then finding any link that says "sweater generators".

If you've made the swatch described on page 1, you can  now make the sweater.  If you haven't made the swatch, go read the instructions on page 1.   If you need help determining the appropriate dimensions for  your sweater, visit the size estimator for adults.   or the size estimator for children.

Began writing program and pondering the simplifications....March 4, 2004
Sweater completed March 12, 2004
Page updated March 13, 2004
Page reorganized ??, 2004

Lucia Liljegren
Visit the whole site!


Web Site Begging:
My site is supported by your annual $3 donation. Please click the to make a $3 donation.


Procedure:


Enter Swatch Data

Enter gauge knit in stockinet.
  • Please read the gauge swatch instructions for tips.
stitches/inch and rows/inch.
Enter gauge knit in ribbing. (Note: if this is mock rib, the number of rows per inch should look remarkably large.)
stitches/inch and rows/inch.
Enter the size needles or tension dial setting used to knit the stockinet swatch. 
The knitting directions will advise one needles size smaller, or one tension dial setting lower (tighter) when knitting the ribbing.  If you used a different setting or needle size, note that in pencil for yourself.
Size needles (HK) or setting on tension dial (MK)
Specify real ribbing, mock ribbing or  a hung hem.
I will use .
You may hand or machine knit.  Some shaping is adjusted to account for the slight inconsistencies most hand knitters have when knitting.
I will  the sweater.

If you want me to estimate how much yarn you  need, enter the weight per 1000 stitches.  If in doubt, round up.  If you have no clue, type zero, ignore all yarn requirement estimates.
ounces/1000 stitches.


Advice:

Based on the data you entered, the gauge ratio is This suitable for this EZ shape program.

Enter Sweater Design Data.

You will first enter data for the back and front of the sweater read the knitting directions for these two pieces, and then scroll down to enter data for the sleeve.
Strictly speaking, you can design the front and back knit them, then design the sleeve and knit them. However, it's a bad idea because you may discover the sleeve width you want won't fit into the armhole opening.  (If that happens, make the sweater into a vest! Just add trim around the armholes and voila!)

Factors affecting the fit of back and front of the Sweater.
Enter the chest width of the sweater.
  • This should equal the wearer's chest size plus 1 to 4 inches.
    • To determine this, pick your favorite sweater in your closet, and measure across the chest width.  Multiply by 2. Enter the resulting value.
inches.
Enter the Shoulder width of the sweater.
  • This should be the wearer's shoulder width plus a little more.
    • The amount more is up to you, but this design is most suitable for fairly fitted shoulders. If the sweater shoulders are more than 1" wider than your shoulders, you will notice the that the sleeves drop off your shoulders.
inches.
Enter the Total Length of the sweater:
  • Sweater length is a matter of taste and current fashion.
inches.
Enter the Armhole Depth for the sweater:
  • This absolute minimum value for the depth is equal to 1/2 the width of the wearer's upper arm plus an 1".  Most people want even deeper armholes. It's a matter of taste.  Jim's biceps measure about 13" or 14".
  • If you like the percentage "rule of thumb" use 1/4 the width of the chest: inches. 
  • Read the warning box which will tell you if the current sleeve width can fit in the armhole.

inches.
Enter the Shoulder Slope for the sweater:
  • This affects the shoulder shaping. It is a very, very difficult quantity to measure. 
  • I advise making it 1/2" for an adult with very, very square shoulders (or if you like shoulder pads). Make it 2" if  your shoulders slope a lot.  I used 1" from Jim's sweater. That matches the value I measured off one of his favorite sweaters.
inches.
Neck Width before adding the neck trim:
  • The width of a V neck is dictated partially by style, but must be at least as wide as the wearers neck.
  • Once again, measure this off a comfortable V neck or crew neck sweater.  Measure at the width of seam connecting the trim and the neck on the back of the sweater.
inches.

Features that affect the appearance of the sweater.


Ribbing or hem depth at bottom of the back and front pieces of the sweater.
  • Once again, measure this off a sweater with ribbing that is as deep as you like it. Some sweater have 1"; some have 4". I like 2" = 3" on sweaters or adults. It's a matter of taste.
  • Alternatively, consult sweater pattern schematics. 
inches.
Width of neck trim.
  • For this EZ design, the neck trim should be narrow.  Measure off a favorite sweater. You'll find it's between 1/4" and 1" deep. 
inches.
Neck Depth (Front):
  • This will be the depth of the V in the front of the sweater. Lay a sweater you like flat on the floor.  Place a ruler across the neck at the two top points of the V.  Measure down from the ruler to the tip of the V. Use that depth.
  • Based on your current selections the head opening will be approximately inches before you add the neck trim.  I can get my 22" head through a 18" knitted opening.

inches.
Tell me if you want to increase stitches 10% after the ribbing or hem of the front and back.

If you are MKing, and using any type of rib I advise picking no. Properly worked MK ribbing tends to draw in enough. Otherwise, consider these factors:

  • HK ribbing draws in compared to stockinet, but it might not draw in as much as you like. 
  • If you are knitting this for a man with nice trim hips and abs, you probably do want to increase stitches after the ribbing. Pick yes.
  • If you are knitting this for a woman with very wide hips and are using ribbing, you absolutely want to pick "no".
  • If you are using a hung hem for a person with a balanced figure, I advise picking "yes".
  • When machine knitting, selecting "yes" involves using the garter bar or taking off on waste yarn and rehanging.
  • Based on your choice the sweater will measure inches around at the ribbing.


Estimated Yarn Requirements:

These yarn estimates are approximate, and are based on the number or ounces/1000 stitches you entered above. To avoid running out of yarn, it is best to buy a little more yarn than suggested.  (I guess if worst came to worst, you could consider knitting the neck trim a different color? That's designing! )
Other than yarn, what else do you need?

Knit the back:

All knitters: Length and row counts are both provided; both provide the same information. However, lengths are useless to MKers and number of rows are inconvenient for HK.  So, just ignore whichever you find them useless.
HK: The lengths are measured from the cast on or the hem fold.  KSF means Knit Side Facing when you begin knitting the row.
MK: Row counts are cumulative and are indicated by RC= 'nn'.  COR means Carriage On Right at the beginning of the row. 


Double check.

Before continuing, it is prudent to double check your sweater.  If you swatch gauge changed when you washed, dried it and let it rest, wash, dry and let the back piece rest.  (Hand knitters who read ahead may find they can do this as they  knit.
If you want to re-estimate the yardage requirements, I advise removing the waste yarn, weighing the back and entering the value here: ounces. The actual weight per stitch is: ounce/1000 stitches. Scroll up and enter this in the weight per stitch box contained in the swatch form, and the form will recalculate the the total yarn estimate.

If the back didn't come out the way you want, unravel it and reknit!

But wait! Get a calculator and use the back as a big gauge swatch.  If you got this gauge knitting the back, that's probably the real gauge.
If the back did not come out the size you expected, try to figure out what you did differently to obtain a different gauge while knitting the back and swatch. Possible culprits:

Knit the front:

The the front is a back with a V neck.
MK: COL means Carriage on Left.
HK: PSF means Purl Side Facing when you begin knitting the row.


Design the Sleeves

Sleeve width at underarm.
  • Enter sleeve width you would like for this sweater.
  • Those who like % sweaters, may want to make the sleeve 1/3 as wide as the body of the sweater. That would be a sleeve width of inches. For Jim, the percentage method results in a sleeve tighter than he likes. For me, it results in a sleeve so tight I can't wear it. 
  • I will warn you if the sleeve won't fit into the armhole.  You can draft a tighter sleeve by scrolling up and designing a shallower armhole. Likewise, if you want a looser sleeve, make the armhole deeper.  

inches

 
Cuff width
  • I measure the wearers wrist and use that value.
  • The number of stitches in the cuff will calculated using the cuff width you specify and the rib stitch gauge. 
  • The width just above the cuff, when you change from ribbing to stockinet will be inches.
inches
Full Sleeve Length.
  • Find a sweater that fits, with a cuff ends at your wrist.  (Or put a pin where you want the cuff to end. If the cuff is folded, put the pin at the fold.)
  • Lay the sweater on the floor face down. Place one end of the tape measure on the center back, run that to the shoulder seam, then continue on down to the wrist.  This is the Full Sleeve Length.  Enter that number in the box to the right.
  • Based on your full sleeve length and the shoulder width, the length of the knitted sleeve will measure inches from the wrist to the sleeve cast off when the sweater is worn.
inches
Cuff length:
  • This is how long you want the cuffs to appear when you wear them. (For turn back cuffs, this is the value after they are folded over. I'll double the value for you!)
  • The best length is a matter of taste.
inches
Turn back cuffs.
  • Toggle to choose fold back cuffs.
  • If you are knitting mock ribbing, I advise against folding back the cuffs because they are already double. I'll let you do choose it though.
I want  cuffs.

Make Sleeves: Make 2.

When knitting the sleeves, you must increase on both sides of the work.  MK: Raise 1 needle on either side of those currently in work. Use 2 prong transfer tool to move the two edges stitches one stitch outwards.  Then fill the empty  needle.  HK: K2, Make 1, knit until only 2 stitches remain, Make 1, K2.  (Make 1 or M1, is a simple increase you can find in any learn to HK book.)

Estimated yarn used to knit the sleeve: each sleeve has approximately  stitches and should require ounces.


  • Shape armhole: Follow the armhole decreases exactly as for the back. RC=; stitches remaining. Length = inches.

  • Now, begin shaping the cap as follows: (Note: At least one of these will be done zero times. Cross it out!)
  • Do the following  times:
  • Do the following times. 
  • Do the following  times:
  • Do the following  times:
  • Bind off all remaining stitches.  RC= inches.   (It's not a bad idea to place a yarn marker between the center stitches. That helps you match up with the shoulder seam when you sew the sleeves into the armholes.)
  • If you have fold back cuffs the length is inches when you fold back the cuffs. (Note: Don't worry about very small numerical inconsistencies in lengths. These are due to rounding when I calculate based on rows, or based on the initial design.)

  • Block

  • Remove waste yarn. 
  • If you like to block, block the sweater pieces.  I like to steam my pieces to set the stitches. Some people don't. Do follow manufacture's directions for the yarn, and practice any steaming on the swatch.
  • If  you used memory yarn, steam the memory yarn to make the ribbing springy.
  • Assemble

  • Mattress stitch sleeves cap to armhole matching the center or the sleeve cap to the shoulder seam.  Match the underarm shaping. 
  • Mattress stitch front to back at side seams. mattress stitch sleeve seams. 
  • Tidy lose ends of yarn. 
  • Wear!

  • All images, programs and text at this site are copyrighted.  Permission is given to knit sweaters and swatches from the directions provided.  @copyright 2004, Lucia Liljegren