Lesson: Roll Over Edging

Navigate my site! 

  • TOP of my site
  • Email Lucia 

  • Vneck 
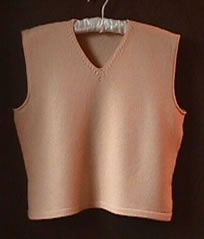
This lesson shows you how to create the armhole trim applied to the armhole trim on my "Cable V Neck Vest". The trim curls from the purl side toward the knit side.  On this vest, the trim has two functions:
    1. It provides an inconspicuous finished look to the edges.
    2. It counteracts the tendency armholes knit in stockinet to curl inward.
    You can apply it to any fitted sleeve armhole knit in stockinet. If left unfinished, the "stitch-column" edge of stockinet tends to roll toward the purl side. Bound off rows of stockinet curl toward the knit side, so this treatment would not be appropriate. If you are looking for a treatment for a row edge, consider the back neck trim on the V-neck shown here. 
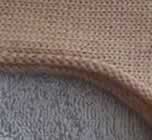
     

    Armhole Trim

    The Knitting Fiend generators do not currently design armhole trims.  So, for the time being, you must create a pattern with fitted sleeves or drop sleeves.  You may also apply this trim to a vest with semi-drop sleeves, but it's a little tricky getting around the 90 degree angle for the shoulder decrease.   Then use this short program to design the trim.  You will find the data for the stitch gauge near the beginning of your directions.  You will find the length of the armhole scye listed after the directions for the back and before the directions for the sleeve.  This number is provided under a heading called "Calculated Values".

    It is best to make a small practice strip to test the tension required for the last row. The latch tool bind off requires that the last row have very loose stitches .  I knit my vest at tension 5.  If you are knitting a heavier yarn at a tension looser than 5, you will want to hand form the last row.

    Calculation:

    Enter armhole scye length: inches.
    Enter stitch gauge from Knitting Fiend:  st/inch
    Enter % reduction in trim length.inches.
     The trim I am using is similar to garter stitch, and spreads.  So, I recommend reducing knitting at a tighter tension and reducing the length of the trim by 10%.

    Knitting Trim.

    1. Assemble the sweater shoulders.
    2. Hang armholes over needles  with the wrong side facing me. (So as to form knit stitches on the front side of the garment.)
    3. Knit 4 rows at one tension setting less than the body of the sweater.
    4. Increase tension setting to 10.  Knit one row. (If yarn is really thick, hand form the stitches to make long stitches.)
    5. Bind off using the latch tool bind off. (See manual.)


    Knit away, fiends!
    Lucia


    Copyright © The Knitting Fiend, All Rights Reserved.