teddy 

Hand Knit Mittens: Flanged

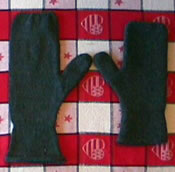
This page has a pattern generator (aka program) to create a pattern to help you knit a mittens on two needles.  Mine are felted and were knit on a knitting machine using the KM version of the pattern available here. (The before and after felting mittens are illustrated to the left.)after

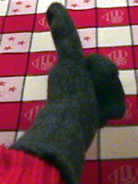
You can make your mittens in any yarn; just enter the gauge and head size in the program, and you'll get the pattern you need.  The first time I saw mittens like these, they were felted and decorated with crewel embroidery on the front. Very pretty. (I don't embroider, so you aren't going to see that illustrated here-- unless someone sends me a picture.)

Main siteblog (read the latest)mitten collectionhat collection and  poncho & cape collection.

You must set your browser to run javascript and to accept cookies to run this program.   With some browsers, the address bar should also read "http://www.thedietdiary" at the beginning. If the www's aren't there, stick them in!

Characteristics of the mittens:

  • Knit from bottom up on two needles.
  • Garter stitch hem.
  • Wrist snugged in by 1 x 1 rib.
  • You may vary size the to fit any hand.
  • You may felt them.
  • You can make them double thickness. (In which case, I wouldn't felt them!)
  • You enter the stitch and row gauge for your yarn.

Felting advice: You  must use an animal fiber, like 100% wool, or the yarn will not felt.  The yarn lable should say the yarn is not be machine washable. When felting, I find it best to knit the swatch loosely. So, use larger diameter needles than you would normally use for the yarn.   Felt the swatch by throwing it the washing machine with a partial load of whites and wash in hot.  Do the same with the  mittens after you knit them.

Remember: Like all patterns spit out by my generators, this is mostly shaping directions.  The purpose of the generators is to let you be creative, while eliminating the need to do pesky calculations.  Since the pattern is free, consider buying yummy yarn from one of my page sponsors? (Check them out to the left.)

Lucia

Google
 
Web thedietdiary.com


Patterns are worth something. Custom patterns should be worth even more.  This is sort of "shareware".   If you knit one of these, please send me a $3 donation.  (Pictures are welcome too!)


Enter Data for Your Mittens

You must modify the following data to match the gauge and shape you want!  Just change the numbers; it recalculates automatically.

 
Replace My Gauge Swatch Information Your Gauge Swatch Information
Note your machine setting on your directions in pen.  You must use the same machine setting when knitting the swatch and the mittens!

Felted:

If you want to felt the  mittens, select "yes" for felted. This makes the thumb 2 stitches wider, which is more comfortable after felting. 
Needle diameter for stockinette swatch: Enter the stitch and row gauge after treating the swatch as you plan to treat the mitten.  For unfelted mittens, this means washed and blocked; for felted mittens, this means the gauge after felting.  

If you are felting the mittens, you must also enter the row gauge before felting. (Otherwise, ignore that box. The program will force it equal to the other row gauge. )

Child's X-small corresponds to 2-4 year olds. Child's medium is for 7 year olds. Child's X-large is for young teens.  "Adult's medium" fits my medium women's hands; adult large fits men's medium hands.  If you want to be more certain, measure a pair off mittens that fit.
 
Based on your input, my program will make mittens  inches long after the change from the ribbing.
Stitches per inch :
Rows per inch :

Rows per inch before felting: 
Size:

Knitting Instructions

Yarn: About 4 ounces for worsted weight mittens, 6-8 for bulky should be generous. The exact amount depends on the yarn you use. (You should make a hat  to go with these anyway.)

You will need two needles diameters; the larger one is used to knit the stockinette portions.  Use a diameter two sizes smaller to knit the ribbing.

Mitten: Make 2.  They are both identical.

  1. Cuff:  With larger needles, cast on  stitches.  Knit  6 rows in garter stitch.  Change to stockinette; knit to until cuff measures inches from cast on.   With smaller needles, knit   rows in 1 x 1 ribbing.  (Optional: carry along a thread of elastic yarn as you knit these rows.)
  2. Begin mitten: Hang a row marker in the middle of the row.  With larger needles, knit rows.
  3. Begin Thumb Gusset:
    1. Inrease one stitch at the beginning of each of the next  rows.  (I knit 3 stitches , then I increase by picking up from the bar of the stitch waiting to be knit.   This looks pretty and doesn't leave a hole.)
    2. Remove stitches from both edges on stitch holders (aka, thick pieces of yarn). Continue knitting on the   remaining stitches for the upper mitten.
  4. Upper Mitten:
    1. Knit until mitten measures inches from the row marker.
    2. K2 tog across row.  Knit 1 row.  
    3. Divide stitches on two double pointed needles.  Fold mitten in half with knit sides facing each other and work a three needle bind off.  The top is now seamed.
  5. Knit thumb
    1. Hang a row marker RC=0;
    2. Pick up the thumb stitches from waste yarn plus 1 stitch at each seam. ( stitches on needle.)
    3. Knit until thumb measures inches from marker.
    4. Knit 2 tog across row, break yarn, thread through stitches. Pull, tight. Use remaining yarn to seam thumb. 
  6. Finish:
    1.  Close side seams and thumb using mattress stitch along inside edge and thumb. Tidy loose ends, steam or block as appropriate for you yarn. Wear. (If you need another mitten, make another one.)
.