green Aran

Eazy Roll Brim Hat

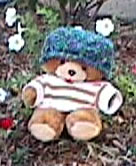
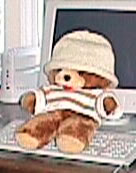
This page has a pattern generator (aka program) to create a pattern to help you hand knit a roll brim hat.  Teddy is modeling two knit out of Lion Brand yarns.  You can make your hat in any yarn; just enter the gauge in the program, and you'll get the pattern you need.

Main siteblog (read the latest)hat collection, and  Poncho & Cape collection.

You must set your browser to run javascript and to accept cookies to run this program.   With some browsers, the address bar should also read "http://www.thedietdiary" at the beginning. If the  www's aren't there, stick them in!

Characteristics of the hat:

  • Knit from bottom to top using circular or double point needles.
  • Knitter decides the length during knitting.
  • Slightly gathered top, which flattens out during wearing.

Remember: Like all patterns spit out by my generators, this is mostly shaping directions.  The purpose of the generators is to let you be creative, while eliminating the  need to do pesky calculations.  This generator will let you make exactly the cape shown, but I encourage you to add your own touche

Lucia

Google
 
Web thedietdiary.com


Design your hat

To design your hat you must pick a head diameter and a tightness factor.  You must also specify the  stitch gauge.  The row gauge doesn't matter much, but I make you enter one anyway.


Have fun knitting and wearing your hat
Lucia


Patterns are worth something. Custom patterns should be worth even more.  This is sort of "shareware".   If you knit one of these, send me a donation.  (Pictures are welcome too!)


.

Enter Data for Your Hat

You must modify the following data to match the gauge and shape you want!  Just change the numbers; it recalculates automatically.

 
Replace My Gauge Swatch Information Your Gauge Swatch Information
Note your machine setting on your directions in pen.  You must use the same machine setting when knitting the swatch and the cape!

Stitches per inch: 
Rows per inch:

Replace My Shape Parameters with Yours 
Data to enter.
Information.
Head circumference.
inches.
This is a medium woman's hat.  Make a man's hat 1-2" bigger.  Make a kids hat 2-3" smaller.  It's best to measure heads. They vary a lot.  But you can also consult this table of head sizes.
Tightness factor percent. Based on your entries, the hat diameter will be. 
inches


Results: Your Hat Pattern

Don't try to edit anything below this point.  If you want to change them, change values in the table above. The summary tables are for informational purposes only.   This is a program. So, please read through al the directions and make sure no negative numbers appear.  (I try to think about where they might appear and create a warning box, but I don't always think of them all.)

Yarn Estimate:

This depends on your yarn. Hats rarely take more than 4 ounces.


Knitting Instructions.

You will need 2 circular needles in a diameter to knit the yarn you selected.  I use a 16" long needle  and a 9" needle.   9" long needles are hard to find. If you can't find one, you will need to use 4 short double pointed needles for the final rounds. (Ick.)
Option: If you hate decreasing, you can skip the decreases and just knit the hat the lenght you like, then run a thread through all the live stitches.  However, the decreases make the top of the hat bunch up less!

  1. Using the longer circular needle, cast on    stitches. 
  2. Round 1: Turn work, slip 1 stitch.  Knit until you reach the last stitch, slip that one.  Now, being careful not to twist, close the round.  Slip the final unknit stitch back to the left  hand point, then knit the 2 slipped stitches together.  This joins the round, and prevents a "jag" at the beginning.  You have one stitch less than before!
  3. Round 2 and up: Knit all stitches.
  4. Continue to knit until the length of the hat equals   inches. You will have knit approximately rounds.
  5. Try the hat on, gathering the stitches slightly with the  needle.  The decreases add about    inches to the hat length, so leave an opening with that size radius when trying the hat on.  Decide how much longer you'd like the hat to be.  Knit that many more inches.
  6. When the hat is the length you like,  place a stitch marker. Slip the marker, *k2 tog, knit 3*  Repeat to the end of the round.  There should be stitches on the needle. Don't worry if it turns out you messed up and have the wrong number of stitches. (You will probably want to switch to the shorter needles.)
  7. Knit    rounds without decreasing .  Then, slip the marker,  *k2 tog, knit 2*.  There should be roughly  stitches on the needle. (If the knitting gets tight, put half the stitches on one circular needle and half on the other. Then knit from one to the other.  Or, use the double pointed needles. Ick!)
  8. Knit    rounds without decreasing.  Then *k2 tog, knit 1* Count the number of stitches left.There should be roughly stitches on the needle.  If the number is odd , unknit the final k2 tog, to make the number be even. 
  9. Knit 1 round.  Then *k2 tog* all the way around.
  10. *k2 tog, yarn over* and repeat until reach the marker. If you have an extra stitch, don't knit it. (The yarn overs make it easier to stretch the stitches around and make the top gather together nicely.)
  11. Break the yarn, draw through the open loops and yarn overs. Pull tight. If you started decreasing immediately after you tried the hat on, the hat will be inches from the cast on.  The top will look gathered. These will stretch out when you wear the hat.
.


Google
 
Web thedietdiary.com


All images, programs and text at this site are copyrighted.  Permission is given to knit sweaters and swatches from the directions provided.  @copyright 2004, Lucia Liljegren