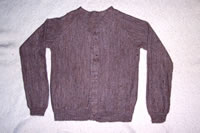
raglanHow To Make a V-Neck Cardigan Band With Buttonholes

 Under construction!  For more  lessons, patterns etc. visit my blog. Look for "generators", or read the various articles.

I made the button band for Jim's Sideways Knit Cardigan using Roz Porter's method, which I discuss in general here.   The pattern generator for Jim's sweater automatically calculates the placement on that sweater. You don't need to measure.  However, if you knit someone else's pattern, and want to add this button band, this page will tell you how to place the buttonholes and provide links to a how to  knit button holes lesson.

This page is adapted with permission from Roz Porter's 1996 newsletter. (Thank you Roz!)

I  modified Roz's text to adjust for the fact that the generator on the page automatically calculates the number or rows and stitches for a button band for your cardigan. I also added a minor extension so; you can adjust the width of the band (assuming you want to do that.)  To learn how to actually knit an individual button band, you will need to read my article "Roz buttonholes" which I published at my blog or Roz's original article.

Good luck!
Lucia
PS. If you are shopping for good prices on knitting machines or parts, AllBrands.com supports every brand available today. Their prices and service are excellent.


  1. Make a Swatch:
    1. Set the machine to knit one or two tension settings tighter than for the garment; so if the garment was knit at tension   knit the band at tension or .   Record the tension setting you used. Cast on 23 stitches and knit about 50 rows, taking it off on waste yarn. Let the swatch rest overnight; it is best to also wash and steam the swatch, as you plan to wash and treat the garment.
    2. After you knit your swatch, enter the data for your swatch in the two left hand columns; the numbers in the right hand column should auto calculate.
      Number of stitches: Width= inches. stitch/inch=
      Number of rows: Length = inches. rows/inch=


  2. Calculate stitches.  
    1. Roz's band: Roz's knits her band 23 stitches wide with 4 stitch  buttonholes. She then folds the band in half along its center. Accounting for the fold and the seam stitches, the the 23 stitch wide band will be inches wide. 
    2.  If you a want a different width band, enter a number for the width you'd like here: band width = inches.
    3. Based on the width you asked for, you should  cast on and knit a stitch wide band. The buttonholes will be stitches wide.
  3. Calculate the rows for buttonhole locations:
    1. Measure your knitted cardigan front. Start at the bottom of the rib on one front and measure up to the place where your V-Neck shaping starts. Enter that figure here: inches. Multiply this length by your row gauge in the table above.
    2. There will be rows to get from the bottom of the front to the V shaping where the top buttonhole will be located. All other buttonholes should be spaced as evenly as possible between the bottom of the band and the top buttonhole.
    3. First button hole: You want your first buttonhole to be 1" up from the bottom. To find where to put your first button hole, multiply by the row gauge. You want it on RC= .
    4. This leaves more rows for the rest of the buttonholes.
    5. Enter the number of buttons you want here: buttons. We need to space the next buttonholes evenly up more rows.  To figure out where to put the holes,  divide rows by buttons;  you get and a remainder of . So, you will want to knit rows after the first buttonholes and rows after the remaining buttonholes. When you make your final buttonhole, you will arrive at RC=.
  4. Calculate remaining rows. Measure from beginning of V shaping to shoulder, across back neck, back down to V shaping. Enter that value here: inches. Multiply your row gauge. Now add to that number. This results rows, which is the total number of rows for the button band. After you make the buttoholes, continue knitting the front band just as before (without the buttonholes of course) and take off on waste yarn. This should make a band that reaches the bottom hem.
  5. Attach your band:
    1. Begin sewing the band to the front of the cardigan. Stretch it just a little as you sew. When you get around almost to the second buttom make sure you are going to have enough band to finish. If you don't go back to your machine, hang the band (still on waste) and knit however much more you need to make it go to the bottom of the sweater. When you are finished, again take off on waste yarn. Now finish sewing front band to cardigan. When you are finished sewing this section, back stitch bind off the bottom stitches on waste yarn. Now fold the band and stitch it to the inside of the cardigan, finishing it as we did in October.
    2. I do this slightly differently from Roz. I mark the row I think will be the final row. Then, I knit about a inch worth of extra rows. Then I take off on waste yarn. When I knit the band, I attach it up to the mark, but use the extra length if I need it. Then, if I didn't need the extra rows, I unravel, and back stitch to bind off at the correct spot.

How to actually make the buttonholes

  1. Instructions to actually knit the buttonhole are at the blog! I've included photographs of each step. I suggest you practice making the 23 stitches band with 4 needle buttonholes at least once, even if you are going to make a wider or narrower one for your sweater. After that, it's pretty easy to understand the concept and modify it for a wider or narrower band. You basicaly change the number of needles cast on and the number of needles in the buttonhole.
  2. The following information will be useful if you requested a custom band. (I'm using values you entered above.) You wanted a inch wide band.  So, you will need to cast on stitches instead of 23 wide band. Your buttonholes will be stitches wide (instead of 4). When you work the needles on ravel cord, count  needles from the edges.
.